| View previous topic :: View next topic |
| Author |
Message |
Dan Belcher
Joined: 10 Feb 2020
Posts: 194
|
 Posted: Sat May 14, 2022 9:29 am Post subject: Dale Earnhardt 1992 Lumina from The Winston Posted: Sat May 14, 2022 9:29 am Post subject: Dale Earnhardt 1992 Lumina from The Winston |
 |
|
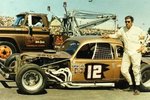
30 years ago we were treated to one of the best All-Star races of all time, the 1992 running of The Winston. Here is Dale Earnhardt's car as it looked in that race. Well, at least before it got junked by the turn 3 wall!
Monogram kit with Powerslide decals. The body is painted with Tamiya TS-14 black, TS-30 silver leaf, and TS-13 clear straight from rattle cans. The chassis and interior of car were airbrushed with MCW Finishes Poppy Red.
I started this car last year and took a long break after I accidentally broke the entire nose of the car, repaired it, and broke it again. I am glad that despite all of the repairs I had to do, it turned out to be my best build yet.


Here are the things I had to modify or build from scratch for this car. I am happy to help if you have any questions about how I did something.
Exterior:
Reshaped nose (I sanded the valence to make it shorter on the left side than the right. I filled in area on left side and simulated the metal piece by painting with Alclad chrome, but painting it with an extra coat to make it look less shiny than chrome).
Added covers to the grille openings on either side of the Lumina decal on the nose.
Larger rear spoiler.
Lowered rear bodywork behind the wheels, and removed some material from the bottom of the rear bumper.
Photoetched grilles (with black ribbon mesh covering the top center grille).
New exhaust pipes.
New quarter windows and air ducts.
Added jack posts.
Added valve stems to wheels, and drilled out the center of the rear wheel hubs and filled in the back of the hole with some plastic.
Wheels are glued directly on, and the connection point on the suspension was cut and shimmed as necessary to get the right wheel depth.
Added a roof antenna.
Photoetched spoiler bolts.
Fuel overflow made from aluminum tubing.
Interior:
Seat (The seat is an older style one Don Lansing scavenged from another kit for me, and I built the left side support from Evergreen plastic sheet. I made seatbelts from masking tape and seatbelt hardware from plastic I cut and painted with a Molotow chrome pen).
Headrest (Evergreen sheet cut to fit with a piece of felt glued on it).
Ignition boxes (made all from scratch with Evergreen plastic and assorted wiring).
Mirror (More Evergreen plastic sheet, chromed with a Molotow pen).
Cooling hoses (26 gauge metal wire wrapped around a rod to create the shape, removed the rod and wrapped the metal wire in PTFE plumbing thread seal tape and painted silver, then black washed with Tamiya panel line accent).
Steering wheel radio wire (wrapped thin plastic wire around a rod to shape it).
Rollbar padding (I added one piece of padding to the A post area bar made from heat shrink tubing)
Last edited by Dan Belcher on Sat May 14, 2022 5:05 pm; edited 1 time in total |
|
| Back to top |
|
 |
Pierre Rivard
Joined: 25 Feb 2021
Posts: 378
Location: Montreal, Canada
|
| Posted: Sat May 14, 2022 4:56 pm Post subject: |
|
|
Wow...I mean wow this is such a gorgeous build.
The nose has healed well form multiple fractures.
The finishes are amazing as you always do them and the scratch building and detailing makes it look like a 1/1 scale car.
As always your photography is the perfect complement to this superb build.
Thanks for the tip for cooling hoses. I plan to shamelessly copy those for brake cooling hoses on a Tyrell P34 project.
Thank you for sharing this inspiring build!
_________________
"When you arrive at a fork in the road, take it" - Yogi Berra |
|
| Back to top |
|
|
CRANMAN1
Joined: 31 Jan 2018
Posts: 218
Location: Clemmons, NC
|
| Posted: Tue May 17, 2022 6:40 am Post subject: |
|
|
| Awsome!! |
|
| Back to top |
|
|
MarkJ
Joined: 29 Jan 2018
Posts: 1303
|
| Posted: Tue May 17, 2022 11:20 am Post subject: |
|
|
| Wow, The ultimate in smooth mirror like paint jobs. Excellent build in every way. You convinced me to get some polishing compound. I couldnt find any Tamiya so I got something called Novus. It has a 3-step system too. |
|
| Back to top |
|
|
Dan Belcher
Joined: 10 Feb 2020
Posts: 194
|
| Posted: Fri May 20, 2022 6:33 am Post subject: |
|
|
Thanks all.
MarkJ, I've not personally used the Novus polishing compound, but I've heard it's quite good too. |
|
| Back to top |
|
|
afx

Joined: 28 Jan 2018
Posts: 270
|
| Posted: Fri May 20, 2022 7:37 am Post subject: |
|
|
| Excellent work. |
|
| Back to top |
|
|
MarkJ
Joined: 29 Jan 2018
Posts: 1303
|
| Posted: Fri May 20, 2022 9:02 am Post subject: |
|
|
| Dan Belcher wrote: | Thanks all.
MarkJ, I've not personally used the Novus polishing compound, but I've heard it's quite good too. |
Dan, I tried it and it even made my brush painted car look a lot better. I think I might try another round of it and hopefully when I finish it off with future after decaling it will really give some improved results. I saw on youtube that people use it on their camera lenses to get rid of scratches. I have a pair of Spy Optic sunglasses like Junior wore a few years back that have developed some scratches that I will try to clean up. |
|
| Back to top |
|
|
Wakefan77
Joined: 22 Apr 2020
Posts: 140
Location: North Carolina
|
| Posted: Thu May 26, 2022 9:34 pm Post subject: |
|
|
Great build!! Love the detail!
_________________
<a><img></a> |
|
| Back to top |
|
|
catpack68

Joined: 22 Jan 2020
Posts: 117
|
| Posted: Fri May 27, 2022 7:14 am Post subject: |
|
|
| Nice work!👍 |
|
| Back to top |
|
|
Henryjint

Joined: 28 Jan 2018
Posts: 1969
Location: NY State's Hudson Valley
|
| Posted: Fri May 27, 2022 7:42 am Post subject: |
|
|
Outstanding build!!!!
_________________
Forum member since 10/25/2010 |
|
| Back to top |
|
|
|

